Installing TestNG in Eclipse
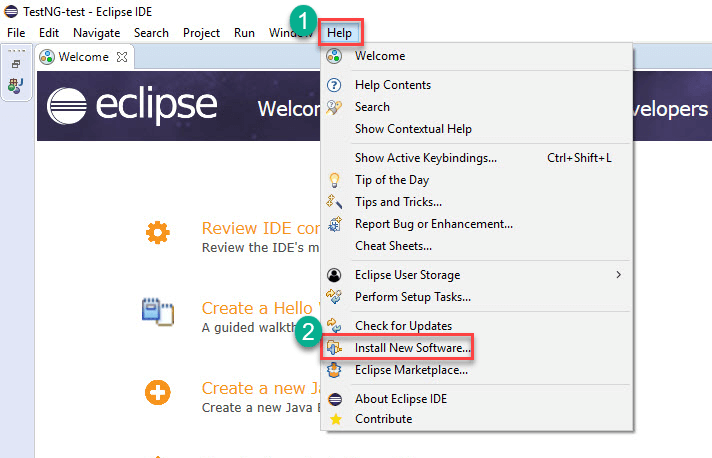
Step 1) Launch Eclipse.
- On the menu bar, click Help.
- Choose the "Install New Software…" option.
Step 2) In the Eclipse Install dialog box
- Enter "http://dl.bintray.com/testng-team/testng-eclipse-release/" in the Work with box
- Click the Add button.

Step 3) In Add repository dialog
- Enter "TestNG" in Name Text Field
- Click on Add button.

Step 4)
- Select the "TestNG" checkbox
- Click on the "Next" button.

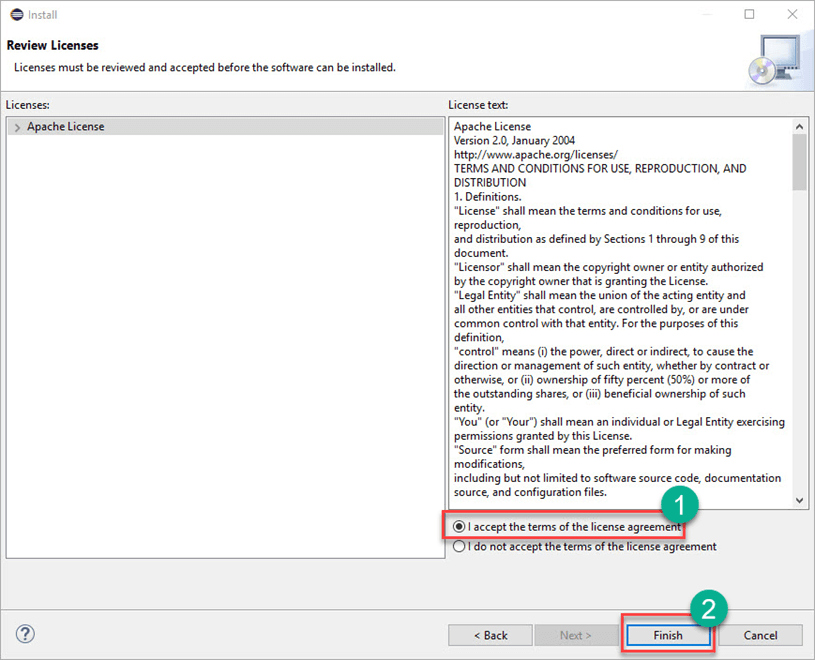
Step 5) It will give you a review of Items to be installed. Click on Next.

Step 6)
- Select the radio button "I accept the terms of the license agreement"
- Click on Finish.
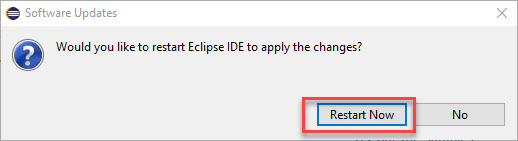
It will take time depending on your Internet speed.
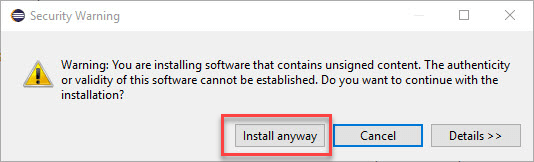
Step 7) If you encounter a Security warning, just click "Install Anyway".
Step 8) Wait for the installation to finish. When Eclipse prompts you for a restart, click "Restart now."
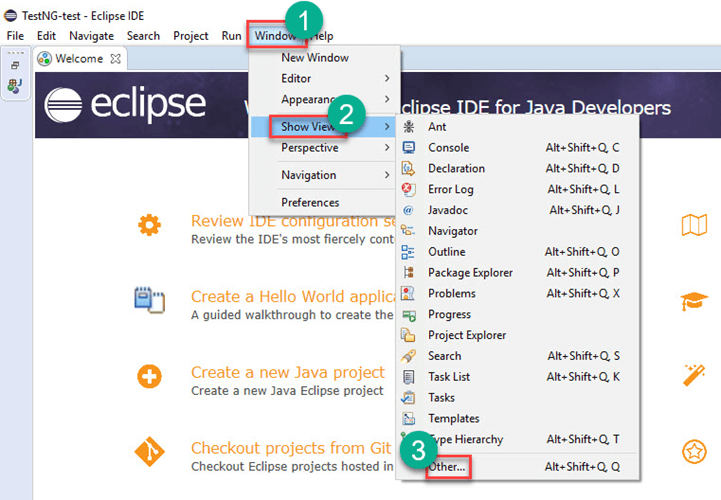
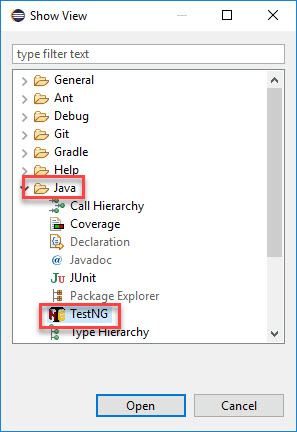
Step 9) After the restart, verify if TestNG was indeed successfully installed. Click Window > Show View > Other.
Then open the Java directory and see if TestNG is included.
That's it to TestNG Installation